CD Ripping / Encoding Guide (part 2)
Fire up CDex. You should be presented with this window:
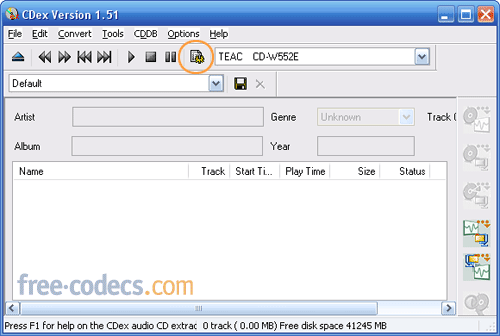
Now either press F4 or the button circled in red. This will bring up CDex’s configuration dialog. Click on the Generic tab.
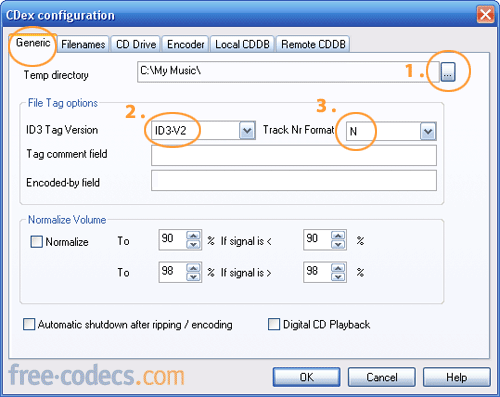
GENERIC SETTINGS:
- 1. Temp directory: This has to be on a drive or partition that has the most amount of free space. Click on the circled button and select a folder [such as C:My Music]
- 2. ID3 Tag version: I recommend ID3-V2, for CDs with very long track and/or artist names. Otherwise, stick with ID3-V1.
- 3. Track number format: select N here.
- Optional: If want to consistant music especially if the the tracks are from different sources, I suggest using normalization.
- * If you don't want the computer to shutdown after, deselect that option. Most new DVD/CD ROMs use digital playback so normally I activate this feature.
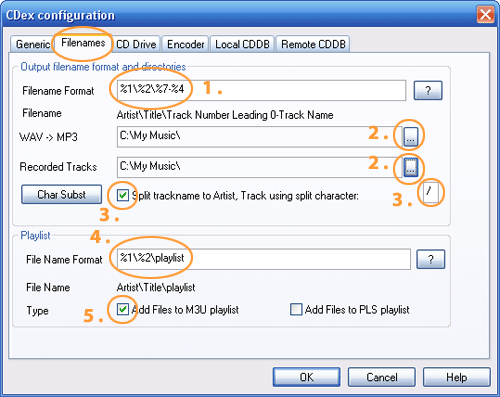
FILENAMES:
- Filename format: type in %A - %2%7 - %4 [or %A%2%7 - %4.] Default no need to change.
- WAV -> MP3 and Recorded tracks: select the folder in which you wish you save your MP3s [for instance, C:My Music].
- Split trackname to Artist, Track using split character: Tick the checkbox. Use / as the separator, if it isn't already filled in for you.
- File Name format: Type in %A - %2%2 [or %A%2%2.] Default no need to change.
- Add files to M3U playlist: Tick the checkbox.
CD DRIVE:
- 1. Ripping method: select Paranoia, Full for more troublesome audio CDS (similar to secure mode with EAC). Otherwise use Standard for non-protected CDS.
- 2. Use Native NT SCSI library if you are using Windows 2000/XP.
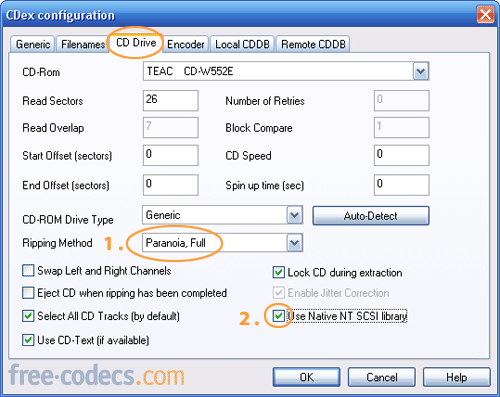
Table of Contents: 1. Introduction; 2. Using CDex; 3. Encoder


